we don’t know if you’re completing your Things. Remember the Cake!
t
we don’t know if you’re completing your Things. Remember the Cake!
t
What is a wiki?
Wiki is taken from the Hawaiian word wiki wiki meaning quick or swift. In Web 2.0 terms a wiki is a website in which content can be added, edited and changed by a group of members. This means a wiki is great way of getting people working together and collaborating online.
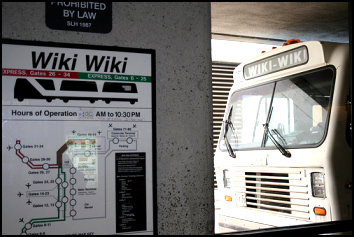
(The Wiki Wiki bus, by Kables)
Some of the benefits that make wikis so attractive are:
And users do not need to know HTML in order to apply styles to text or add and edit content. In most cases simple syntax structure is used.
Are all wikis open to everyone?
No, the ethos of sites like Wikipedia is to be open and allow anyone to contribute – a wonderful idea, but this can cause problems. However, in most cases you will only want certain people to be able to contribute or even to see your wiki, especially if you’re using it in a work context.
Watch this short film to see just how useful wikis can be…
Watch this video to see how easy it is to contribute to a wiki…
Note: As of 2013, wetpaint.com is no longer in the business of wiki-hosting. There are plenty of other free wiki-hosting services. Examples are PBworks, Wikidot and Wikispaces. You’ll get a chance to try out PBworks this week!
Some of you will have seen and most likely used Wikipedia to find information.
Step 1: Choose the random article link, keep clicking on it until you find an article that interests you, and write about it in your blog.

Step 2: Click on current events link and see what’s in the news – put this in your blog post too. Be sure to click on the “talk” or “discussion” tab on the article to see what people are saying about it. (What are talk pages?)

Here you’ll get a chance to contribute to a wiki.
Check out the 23 Things @ PPL 2015 Wiki hosted by PBworks. Anyone can view this wiki but you’ll need to request access to edit it. Please do so! If you don’t get approved within a few hours, please send Nicole (nicole.carter@smu.ca) an email with an email address you’re using for the 23 things programme.
The objective of Thing 11 is to add some content to our wiki to create a “Guide to Delicious Halifax“; a compilation of all our favourite restaurants, recipes, etc. We’ve already added some content to the wiki but it will be much better once everyone has added something to it.
Let’s Get Wiki’d!
Step 1: Go to the wiki and click on the Guide to Delicious Halifax link.
Step 2: Browse through the wiki site and select one of the pages that you would like to add some new content to — it might be to add your favourite restaurant, your favourite recipe or to add further detail to what others have already posted.
Step 3: Once you are looking at the relevant page in the wiki (which might be blank if no-one has added any content yet), click on the “Edit” button. You should now be able to edit the text of the page. You can use the toolbar to format the text and, if you are feeling adventurous, you can add links to other pages, even new pages.
If the page doesn’t already exist, then select “Add Link” (as shown below).
Don’t forget to click on the “Save” button periodically!
If you enjoyed adding content to the wiki, explore some of the other links in the “Guide to Delicious Halifax” and either add new content or update some of the existing pages! You can think of this wiki as an ever-evolving beast that no one is in charge of. We all have an equal say in what direction it takes, as directed by what we all put on it. It becomes what we all make it.
Optional tasks
Optional task 1: Explore some of the wikis hosted on the Wikia web site. There’s plenty to choose from, including Wookieepedia (Star Wars), Muppet Wiki, Psychology Wiki, and the Recipes Wiki.
Optional task 2: Write a new blog post about your experiences with wikis. Do you think they are useful tools?
Optional task 3: Create your own wiki using PBworks. Watch this video for all the details: https://www.youtube.com/watch?v=SZ5OV14v4xU And, of course, blog about it if you want your followers to view or contribute to it!
Photo sharing websites have been around since the 1990s, but it took a small startup site called Flickr to catapult the idea of “sharing” into a full blown online community. Flickr has become the fastest growing photo sharing site on the web and it was one of the first websites to use keyword “tags” to create associations and connections between photos and users of the site. To date, over 3 billion images have been uploaded to the Flickr site!
For this Thing, you’ll take a good look at Flickr and discover what this site has to offer. Find out how tags work, what groups are, and all the cool things that people are using Flickr for.
Resources for Week 3
Using Flickr
Take a good look around Flickr and look for an interesting image that you want to blog about.
It might be a picture of somewhere you’ve gone on holiday or maybe a photograph taken near where you live. Be sure to include a link to the image on your blog post.
When looking at images on Flickr, check to see if the image has a list of tags — these are keywords or labels which help you find images. For example, here are all the images that have been tagged with the words Halifax, Nova Scotia.

by Dennis Jarvis
So go ahead, explore the site and have some Flickr photo fun and if you’re interested in looking at some other photo hosting sites, then why not check out:
Flickr currently has over 3 billion images, so I’m sure they won’t mind if you add a few more!
Create a Free account in Flickr (you will be able to use your Yahoo account, created in Week 1) and use a digital camera or mobile phone to capture a few pictures of something interesting. Upload these to your Flickr account and tag at least one of the images 23Things@PPL2015 and mark it public.
Next, create a post in your blog about your photo and experience. Be sure to include the image in your post.
If you would prefer not to upload your own photographs, then browse through some of the pictures from The Commons, download one of them, and then upload the picture to Flickr. The Commons is a collection of copyright free images from museum and library image archives.
Photo Etiquette
A quick word about photo posting etiquette! When posting identifiable photos of other people (especially children) is it advisable to get the person’s permission before posting their photo in a publicly accessible place like Flickr. Never upload pictures that weren’t taken by you (unless you have the photographer’s consent or the image is in the Public Domain) and always give credit when you include photos taken by someone else in your blog.
Please refer to Week 2, Thing 6 [http://wp.me/p5Cg5y-28]
in the list of 23 Things @ PPL Participants over on the right hand side of this page, please send Terri a reminder.
That is all.
t
Hey There,
After a hard 10 week slog through snow drifts and weird internet terminology we will celebrate your determination with cake and dun dun dun… Marie has generously offered a gift card or two for which there will be a draw. As you complete the 23Things and blog about them, you get cute little tick marks on my paper ledger (there must be a fun web 2.0 way to do this, must investigate). Those who complete all 23 will have a chance to win!
Everyone will get cake.
You’ve heard of RSS? You’ve seen those small funny orange icons on websites? You’ve heard friends and colleagues swear by it, but still have no idea what RSS is?
RSS stands for “Really Simple Syndication” and is a file format for delivering regularly updated information over the web. Just think about the websites and news information sources you visit everyday. It takes time to visit those sites and scour the ad-filled and image-heavy pages for just the text you want to read, doesn’t it?
Now imagine if you could visit all those information sources and web pages in just one place and all at the same time … without being bombarded with advertising… without having to search for new information on the page you’d already seen or read before… and without having to consume a lot of time visiting each site individually. Would that be valuable to you? Well, it’s available now through a newsreader and RSS!
This week’s Things focus on learning about RSS news feeds and what free tools you can use to do this.
Tasks
Sample newsfeeds
… and don’t forget to add all the 23Things participant’s blogs to your reader.
There are many options for web and mobile password keepers, your memory or a list kept on your desktop, but when it comes to security you want the best. “It used to be that password keepers only had to encrypt your passwords. Now the best password managers give you the options to sync or keep them local only, change web passwords with a click, log in to sites for you, and more.” http://Lifehacker.com/tag/password-managers
These days, people are getting pretty good at coming up with passwords that are long and complex, so that they can’t be guessed by hackers. But we’re all still pretty bad at not reusing passwords, and that’s dangerous. If you use the same password for any two of your accounts, then an attacker might only need to break into one of those two systems in order to break into the other. And because the bad guys can rely upon the majority of the people with accounts on the first system using the same passwords for their accounts on the second, this kind of attack is very popular.
Remembering hundreds of different passwords is just-about impossible, though. But the good news is, you don’t have to! There are a plethora of password managers: programs which will remember your passwords for you. Some keep your passwords securely on a pendrive, others store them encrypted on the web, others still represent a ‘formula’ by which passwords can be generated (and re-generated) on demand. Not only do these tools make you more secure online, but – once you get used to them – they actually make your online life faster and easier, too. Try one of these:
Tasks

Image by Opensourceway on Flickr
Next week we will begin to look at images; it’s important to understand the basics of what you can and can’t use online. This post won’t/can’t cover it all (governments are grappling with the complexities of online copyright as we speak!), but we’ll look at Creative Commons and how it frees us to share and reuse online.
Creative Commons is a nonprofit organisation that offers a simple, standardized way to give public permission to share and/or use your creative work. CC licenses offer various levels of permissions, from ‘all rights reserved’ to ‘some rights reserved’. CC licenses are now commonly found on photos, blogs (including this blog), published material, teaching resources, music and more.
.
An example of a Creative Commons Attribution-NonCommercial 4.0 International License
A video to explain Creative Commons.
Tasks
And an explanation of copyright in Canada
Copyright law exists to protect the intellectual standing and economic rights of creators and publishers of all literary, dramatic, artistic, musical, audiovisual and electronic works. As long as the work is original, copyright protection is automatic. You break copyright if you:
Websites that rely on collaboration, user contribution and the sharing of files all run the risk of breaking copyright law. Even using somebody else’s photograph without permission on your website can get you into serious trouble. The safest way to proceed is to ask the creator for permission to use their content, or to look for content registered under Creative Commons.
Some individuals could use a social networking site, blog or wiki to criticize an organisation or post libelous, inappropriate or illegal content. In 2014 two individuals were convicted of sending abusive tweets to Caroline Criado-Perez. The ability for people to anonymously post defamatory and offensive comments on social media sites is of major concern to local authorities and individuals. Some authorities will have guidelines for the use of Web 2.0 for business purposes. Remember that bad press gets round fast with social media.
Tasks
Now that you have a blog, it’s possible to moderate people’s comments before they are published, but if you do moderate then you are legally responsible for the content, so you could be liable if it breaches copyright or is defamatory. Legally, it’s simpler not to moderate and publish full disclaimers. You can find examples of blog disclaimers by searching google.
Most Web 2.0 software is free as it comes with third party advertising: some of these adverts may be inappropriate or offensive and could become associated with yourself or your library authority. Loss of reputation could also occur if editorial attention is not paid to any contributions made to a site (on a wiki for example) and the site becomes badly organized or publishes inaccurate information.
Finally, think about what you are saying about your employer when you use social media. Internet history is littered with people who bad-mouthed their boss or colleagues during a drunken night on Facebook, and got fired the next day. If you’re going to vent your anger, do it at the pub rather than in writing.
Welcome to week 1 of 23 Things @ PPL 2015!
Watch this short video clip Web 2.0 … The Machine is Us/ing Us. It illustrates the rapid development of web based communication and information tools and the way they encourage collaboration.
Over the course of the next few weeks, this blog will highlight a selection of technologies with exercises to help you become familiar with blogging, RSS news feeds, memes, wikis, twitter, online applications, and video and image hosting sites – in total, 23 things.
Each week we will introduce a new set of things, with exercises for you to complete.
You will be allowed work time each week – discuss with your supervisor how best to use this time, whether in short bursts or in one go. We hope that you will also spend some of your own time learning about the different things, either at home or at work. If you need help with any activity please contact one of the team (Nicole, Sally, Sue, Terri) or work with your colleagues.

You should work at your own pace tracking your progress through a blog where you will be expected to record your thoughts and experiences and add any ideas you may have on how to use these different Web 2.0 tools for yourself or at work. This is your time to experiment, have fun, and learn at the same time.
You can choose to use a screen name if you prefer to keep yourself anonymous. This name will be posted on your blog, but your “real identity” will not be listed. All participants will be linked to the 23 Things @ PPL 2015 blog but you will be anonymous if that’s what you choose.
Why blog?
People blog because they want to share with others. They may share their opinions, rants on particular topics, or news from a holiday. They may even have a professional blog where they share views on their work, or they may have a blog all about their pets. When you’re blogging, you can adopt any persona you like. Some people have written from the perspective of a cat.

(keyboard kat by The Flooz)
This program is based upon blog entries and during its course you’ll need to write on your own blog about each thing you complete. That will let the team track your progress. Will you want to continue blogging after you’ve finished? You may change your ideas on this throughout the course – let us know what you think.
Setting up your blog
Now that you’ve done some exploring around this blog and understand how the program will work, it’s time to set up your own personal blog. We would also like you to write your very first post where you can introduce yourself, or your persona, or explain what the blog is about.
Remember, your blog is where you will be recording your thoughts and experiences for the 23 Things program. If you are not sure how much to write, we would suggest at least 100 words each week, but don’t be limited – write as much as you like!
For this exercise, “Set up your blog,” we are using WordPress, a free online blog hosting service that is extremely easy to use.
Step 1: Go to the WordPress website.
Step 2: Click on Create Website – remember, you can use a made-up name if you want. Fill in the form, scroll to the bottom and click the Create Blog button under the Free column. Click “Next” and follow the instructions. Make sure you make a note of your username and password and the blog address.
Optional extra
When you get an email confirming your blog, you will be able to choose a different theme if you want to personalise your blog’s appearance – just look for the link about themes and search for one you like.
Registering your Blog
Copy and paste the URL of the blog YOU have created (the URL can be found in the address bar on the page from which you are viewing your blog) into an email and send it to Terri.
Once you have registered your blog it will be listed here on the 23 Things@PPL 2015 Blog. Our 23 Things blogs are a good place to gain inspiration and to support each other via the comments section in the individual blogs.
Important: Bookmark your blog!
Save your blog to your browser’s bookmarks or favourites folder so that you can return to it quickly later. You’ll need to add an entry to your blog for each 23 Things task you complete.
Use your blog to write a short post about your experiences using digital tools for sharing and collaborating in research, teaching, and general communication — and what you hope to get out of the 23 Things program. Or, tell us what this first week has been like. (If you already have a blog, you are welcome to use it.)
So, how was it for you?

(Retro Keyboard by smileham)
Over the next ten weeks, this online learning course will give you a friendly introduction to a range of digital tools. You’ll have a chance to experiment with tools and techniques, from blogs to Twitter to social bookmarking. Each week we’ll give you some “Things” to look at, and a few simple tasks to help you get started using them.
The first week of Things will be posted on Monday 2 February.
To take part in this program you will need a Yahoo account and a Google Mail account. Some of you may already have these, in which case use them. Otherwise follow these instructions to set up your new accounts…
Yahoo
Click here to create a Yahoo account. Make a note of your username and password.
Now create a Google account that you can use for email, or when you want to use other Google services such as Google Docs. To create an account click here.
So visit this site to get started with 23 Things@PPL 2015. (https://23thingsppl2015.wordpress.com).
If you want to know a bit more about the background of the 23 Things idea, visit this website.
If you’ve got any questions, you can contact a member of the 23 Things@PPL Team:
I hope you dance....
and Her Apprentice
All that is gaming
Can you spare a toothpick?
because cats can be jerks sometimes.
Fearlessly going ... Somewhere!
We Love Morning Walks!
Tuuli the Wonderdog
I hope you dance....
and Her Apprentice
All that is gaming
Can you spare a toothpick?
because cats can be jerks sometimes.
Fearlessly going ... Somewhere!
We Love Morning Walks!
Tuuli the Wonderdog


